

![[I Want to Start DTM!] Preparing to Make Songs with VOCALOID](https://media.ragnet.co.jp/img/1200__jpg__https://www.studiorag.com/files/2017/02/439c87c6b278aab1b8944f134582a1bf.webp)

I want to try making songs with Vocaloid!
But I don’t know how to start.
.
.
For those who are thinking of starting fresh, I’d like to go through it step by step.
- How to Program Vocaloid for DTM Beginners
- [For DTM Beginners] How to Create Original Songs Using Vocaloid
- I want to start making music with Vocaloid! A clear guide to the types of Vocaloids and their features.
- [For DTM Beginners] How to Make a “Sang It” (Utattemita) Cover in Cubase
- I want to become a Vocaloid producer. How a beginner like me can become a Vocaloid P.
- [For Vocaloid Beginners] Adjusting Vocal Vibrato and Arranging Songs
- [For Vocaloid Beginners] How to Create Instrumental Tracks and Input Lyrics
- [Vocaloid Beginner’s Guide] How to Add Dynamics and the Final Process
- I tried using VOCALOID5 to take on the challenge of singing a male vocal song.
- Let's try using VOCALOID5
- Let's try using VOCALOID4
- Try creating an English song with VOCALOID5
- From creating the instrumental for a Vocaloid song to completion: Christmas song edition
First, the basics of the song.
http://o-dan
net/ja/
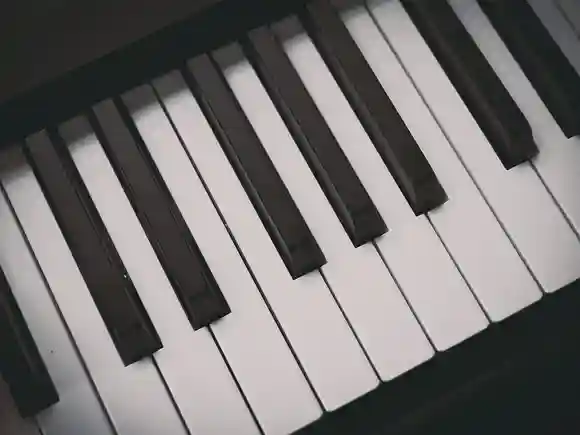
As a fundamental of music, "Melody」「Rhythm」「HarmonyThe three are said to be important.
If it’s a vocal track, the “melody” is the vocal.
“Rhythm” is generally created by the drums, while “harmony” is typically produced by the other instruments.
If you're someone who can play all the instruments by yourself, you might be able to perform and record everything. But normally, you either ask someone to play or create the performance with programming (sequencing).
Programming (uchikomi) refers to creating data that enables automatic performance by using a computer tool or a device with data playback functionality called a sequencer.I will say it.
Simply put, it means creating sheet music that can be used on a computer or a sequencer.
like thisMusic production using a computer is called DTM (Desk Top Music).。
This time, I’d like to explain, step by step, the procedure for creating a song sung by a Vocaloid using DTM.
First, prepare a computer and an audio interface.
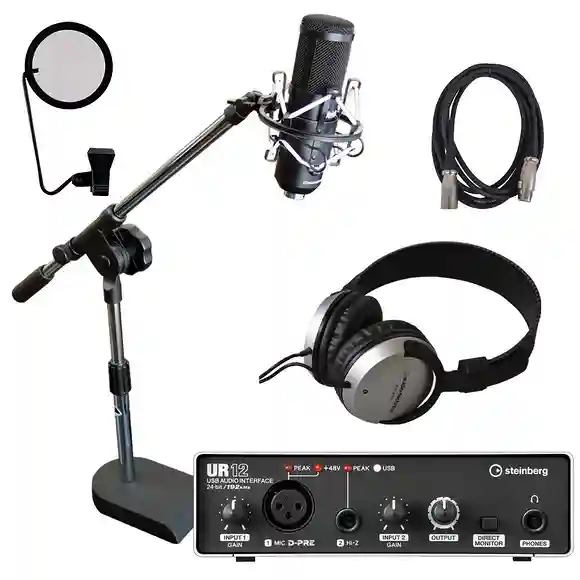
Whether you're doing DTM or processing recordings at home, you can't even get started without a computer and an audio interface.
Whether you're recording guitars and bass to aim for a full band sound or pursuing fully digital EDM, you'll need an audio interface with solid input and output capabilities.
Since computer units almost never have a phone (headphone/mic) jack, you’ll need an audio interface even when using a microphone for vocal tracks.
And since most audio interfaces come with a DAW (Digital Audio Workstation: music production software), you can set up a basic production environment as long as you have a computer and an audio interface.
I recommend interfaces from manufacturers that make DAWs, such as Steinberg or PreSonus.
Reference:[By Rank] How to Choose an Audio Interface: Recommended Models
The price is affordable and they work well with the same maker’s DAW, so if you’re just starting out, I think it’s best to choose from these two brands without pushing yourself.
As your level rises, the things you need will naturally come into view.
One thing to be aware of is that audio interfaces have different types of standards for the cables used for connection.And generally, standard PCs come with USB ports, while Macintosh computers typically have Thunderbolt ports.
You'll also need an audio interface that complies with this standard, so please choose one that matches the PC you're using.
Reference:Cable & Connector Encyclopedia
Set up the environment
After turning on the computer and getting it ready to use for now, connect the audio interface to the computer.
These days, most audio interfaces work fine in almost any setup, so it’s okay to choose based on your preference.
Most audio interfaces can be used simply by installing the drivers according to the manual.
Please think of a driver as a dedicated program used to control an audio interface from a computer.
This is an important section, so be sure to read the manual carefully and follow the procedures when operating.
Reference: How to set up an audio interface on Mac
Reference:What is the ASIO driver that always comes up in DTM?
In many cases, you will be asked to restart here, so please go ahead and restart once.
Next, we will install the DAW.
This can also be easily installed from the CD included with the audio interface or from the CD inside the package.
In many cases, there is license activation with a serial code after installation, so be sure to confirm that you have the code and keep it on hand.
If you’re experienced, you might be tempted to memorize everything at once and get it all done in one go, but if this is your first time, please follow the manual and proceed step by step in order.
Add audio sources and more.
If you've made it this far without any issues, the DAW launch icon should be on your screen.
Let's try launching it once.
Initial setup and other configurations are performed automatically, progressing the setup to an environment where sound can be output.
This part varies depending on the DAW you use, so please refer carefully to the relevant DAW’s guide or manual.
Reference:[For DTM Beginners] How to Use Studio One: Installation Guide
Most DAWs come with the manufacturer’s stock instruments included.
For example, Steinberg's Cubase comes with a sound module called Halion Sonic SE, which includes many instruments and sounds from its parent company, Yamaha.
A sound module that can output many instruments or sounds simultaneously from a single unit is called a multitimbral sound source.
Native Instruments’ KONTAKT, UVI’s Falcon, and IK Multimedia’s SampleTank are also multitimbral sound sources.
If you start to feel that the included sound sources aren’t enough, you can expand what you can do by adding these additional sound sources.
First, try using the included sound source to perform the operation to produce sound.
Let's take a look at how to easily produce sound in Cubase.
be/5dW92NMDLRs
I launched the synth rack and loaded a piano sound in HALion Sonic SE.
Clicking the keyboard at the bottom of the screen should produce sound.
Launching Synclavier [F11 key]
After that, I create one MIDI track and set it to send the performance data from the MIDI track to HALion Sonic SE.
Once the setup is complete, any keyboard operations you perform while a MIDI track is selected will be sent to HALion Sonic SE, allowing you to play using the keyboard.
Finally, we’re adding one more code track.
By connecting it from the chord track to the MIDI track you just created, the chord instructions will be sent to HALion Sonic SE, enabling it to play the chords.
If no sound is produced with this operation, please check the cable connections, the speaker or headphone connections, and whether the drivers are installed.
For people using a DAW for the first time, I think the first hurdle is not knowing the signal path the sound takes before it comes out. To make the most of this valuable tool, please review the basics carefully so you can truly grasp them.
As long as you can at least make a sound, a lot of fun awaits you from there.
Next, I’d like to actually try creating a song through some simple steps.
Don't be afraid—give it a try!